Food for Urban Nomads brings you a simple breakfast, also one that I have been craving for few weeks already.
Ingredients:
1 large egg
1/2 cup milk
1 1/2 - 2 tbsp sugar
butter
4 slices bread
peanut butter
1) Crack egg into a bowl, add in milk and sugar, and beat the egg
2) Spread peanut butter on bread and sandwich them together
3) Dip bread in egg. Becareful not to soak the bread in the egg mixture too long if not you will end up with a soggy bread.
4) Put bread into a buttered non-stick pan.
5) Pan fry for 2 minutes on medium high heat, or until surface turns brown.
6) Flip bread over and repeat step 5.
7) Serve and enjoy!
On a side note, Yuan and I have shifted to a new place, where we will live for 2 months until the end of our nomadic experiences! See you soon! :)
Firstly, I would like to apologise for the loooooooooong hiatus. Here's why: since the previous post in September, Yuan and I got into a huge black hole of stress preparing for our finals, because its the grand finale! Yes the last architecture studio crit of our Masters degree. We were really living like zombies until the end of October. And then there was graduation, visiting parents and time to vacate our beloved house.
So now, finally I have some time to continue (yyyaaaayy!!!) and I hope you will continue to stay with me as I share more recipes and more interesting things with you.
For your information, the both of us have left Tasmania, one of the most beautiful places in Australia, to Sydney. And with this, I hope to be able to bring you more interesting events!
Now here's a cute recipe for you:
While I was back in Malaysia at the end of last year, I went to visit my grandmother in Terengganu (east coast of Malaysia peninsular). Knowing that grandma has many tasty recipes to share, I decided to show her my cooking videos. I felt embarrassed at first (it just feels so strange sharing your videos with your family members ><) but to my surprise she actually enjoyed watching them!
So today, I will be sharing my grandmother's cute recipe with you, Kuih Moho. To be honest, I have never came across this, neither have I heard of the name. To me, it is just a cupcake, and I really mean CUPcake. But it is special coz of the simple ingredients and baking method. Since grandma was eager to share this recipe with me, I took the opportunity and asked her permission for filming, and she said YES!
Very simple ingredients: (yields up to 50 cupcakes) Sweet potato mixture
4 sweet potatoes (approx. 15cm in length)
1 bowl water (2 cups)
Dough
1kg pau flour (or cake flour)
400g sugar
4tsp yeast with 1/4 bowl water (1/2 cup)
6 small eggs/4 large eggs
1 bowl water (2 cups)
Directions: Sweet potato mixture
1) wash and clean potato, and either steam or boil them till they are cooked. You can check by piercing a fork through the potato. If it is cooked, you should be able to pierce the fork through easily.
2) peel the potatoes and mash them in a bowl
3) add a bowl (2cups) of water and continue mashing/mixing
4) strain the mixture through a sieve to ensure you don't get chunks of unmashed potatoes
Dough
1) prepare yeast: instant yeast powder dissolved in 1/2 cup water
2) in a large mixing bowl, pour in flour, sweet potato mixture, sugar, eggs, yeast and water
3) keep mixing/kneading the flour until you get a sticky, elastic and moist texture
4) divide the whole mixture into 2 portions so that the dough can rise more effectively. Cover with a cloth or like my grandmother, she uses more bowls :) leave that for 30-40minutes.
5) while waiting for the dough, prepare a steamer and bring 1-1.5 litters of water to a boil
6) grandma uses small tea cups! wash them clean
7) after 40minutes, take a teacup and scoop a spoonfull of dough into the cup. place that in the steamer rack
8) steam for 10minutes
9) remove cupcakes into a plate filled with water (to halfway up the teacup). this is to cool down the insides of the cup so that it will be easier to remove from the mould
10) after 5 minutes, with a fork, gently push the sides of the cake and it shall pop out very easily.
11) serve and enjoy!
dough covered for 40minutes
little teacups! Grandma has heaps of these cuties and I am surprised you can actually use these cups to make cakes!
so tiny~
cupcakes!
these cakes are very soft and fluffy, and taste sooooo good!
here's the video recipe to it.
It was Yuan's birthday last week, we wanted to surprise her with not-another-cake, so we made her a giant fruit jelly cake for her and it was yummy and very wobbly~
I shall make a recipe video on this one day. It was really good!
Have you ever experienced awkward silence in a conversation? Wish that you could react fast enough to break the icy cold silence? Fear not, start memorising a few "Fill The Silence"-s from here, or if you think that the squiggly words are too challenging to read, try OMGfacts. You'll be surprise how the conversation can roll from there!
Thesilenttiger LOVES to read fun facts, and she always have a couple up in her sleeve during a conversation. Except, wrong timing, always. The conversations were rolling fine, but she have this randomness in her, and she couldn't stop herself from blurting them out, causing a short awkward silence with a burst of laughter after that. Well well, she's still our favourite joker. *smiles*
So, today we're gonna introduce this dish/ all time favourite/ snack/ gymfreakwillnotgetclose to you guys, steamed glutinous rice with chicken or best known as Lo Mai Gai (in Cantonese). This dish is usually served in chinese "high-tea" places, such as the coffee shops or dim sum places, where all yummy food secretly gather together to plan on conquering the world. The version we made was rather plain compared to the authentic ones, as we've removed the Chinese sausages and dried shrimps (thesilenttiger dislikes them).
Ingredients:
2 pcs chicken thighs
2 pcs shiitake mushrooms
1 cup glutinous rice
3 cloves garlic (minced)
3/4 cup water
Marinate (make double serves for both chicken and rice)
1/2 tsp oyster sauce
1/4 tsp light soy sauce
pepper
1/2 tsp chinese cooking wine
1/2 tsp five spice powder
1/4 tsp dark soy sauce
1. Soak to soften the chicken thighs and shiitake mushroomn and cut them to half.
2. Add in the marinates and mix well.
3. Cover with plastic wrap before putting into the refrigerator. The marination process have to be taken for at least two hours, but we recommend you to leave it overnight and cook it first thing in the morning.
4. As for the rice, the amount of marinates is the same, but also add in 3/4 cups of water.
5. Stir evenly and cover with plastic wrap, then into the fridge it goes.
6. The next morning, heat up oil in a pan and add in the chopped garlic.
7. Sauté
until fragrant and slightly browned, then throw in the chicken and mushrooms. 8. Stir fry for a minute, then add in a quarter cup of water. Place the lid over the pan and simmer on medium low heat for 2 minutes. 9. Set the dish aside after 2 minutes as we assemble the dish. The chicken should be half cooked for now, as you will still need to cook it another round together with the rice. 10. Prepare a porcelain bowl and add a drop of oil into the bowl. (If you follow traditional recipe, you will need an aluminium bowl, but porcelain works as well) 11. Using a paper towel to coat the sides of the bowl for easier removal later. 12. Place one chicken thigh and 2 mushroom pieces to the base of the bowl and some sauce that didn't get absorbed. 13. Then, divide the rice into two portions and scoop one portion into the bowl, also adding the leftover marinate.If the marinate does not cover till slightly above the rice level, add in plain water. 14. Place the bowl in the steamer and cook for 20 minutes on medium heat. 15. After 20 minutes, place a plate over the bowl and carefully turn it over to remove the rice from the bowl to serve. If you've forgotten to oil the bowl, you'll find it hard to separate the rice from the bowl, so don't forget to oil the bowl!
Watch the video recipe:
Enjoy the steamed glutinous rice with a cup of coffee (click here for recipe!) and your Chinese life would be complete!
Fun Fact #1: Do you know that many airlines require the pilot and copilot eat different meals on flights to ensure the safety of at least one of them in the rare occurrence of a food related illness?
Typing this while waiting for the arrival of thesilenttiger. She left me alone at home while she travel lovingly with her other half in the city of civilization. *cue home alone movie soundtrack, or maybe sad violin song?*
Well, this post is loooooonnnnggg overdue, due to none other than.................procrastination. Hello? it's holiday yo, I have thousands of pla...........nah, I don't have any, except for eat, sleep and shit, and of course, making some delicious, yummy in my tummy food!
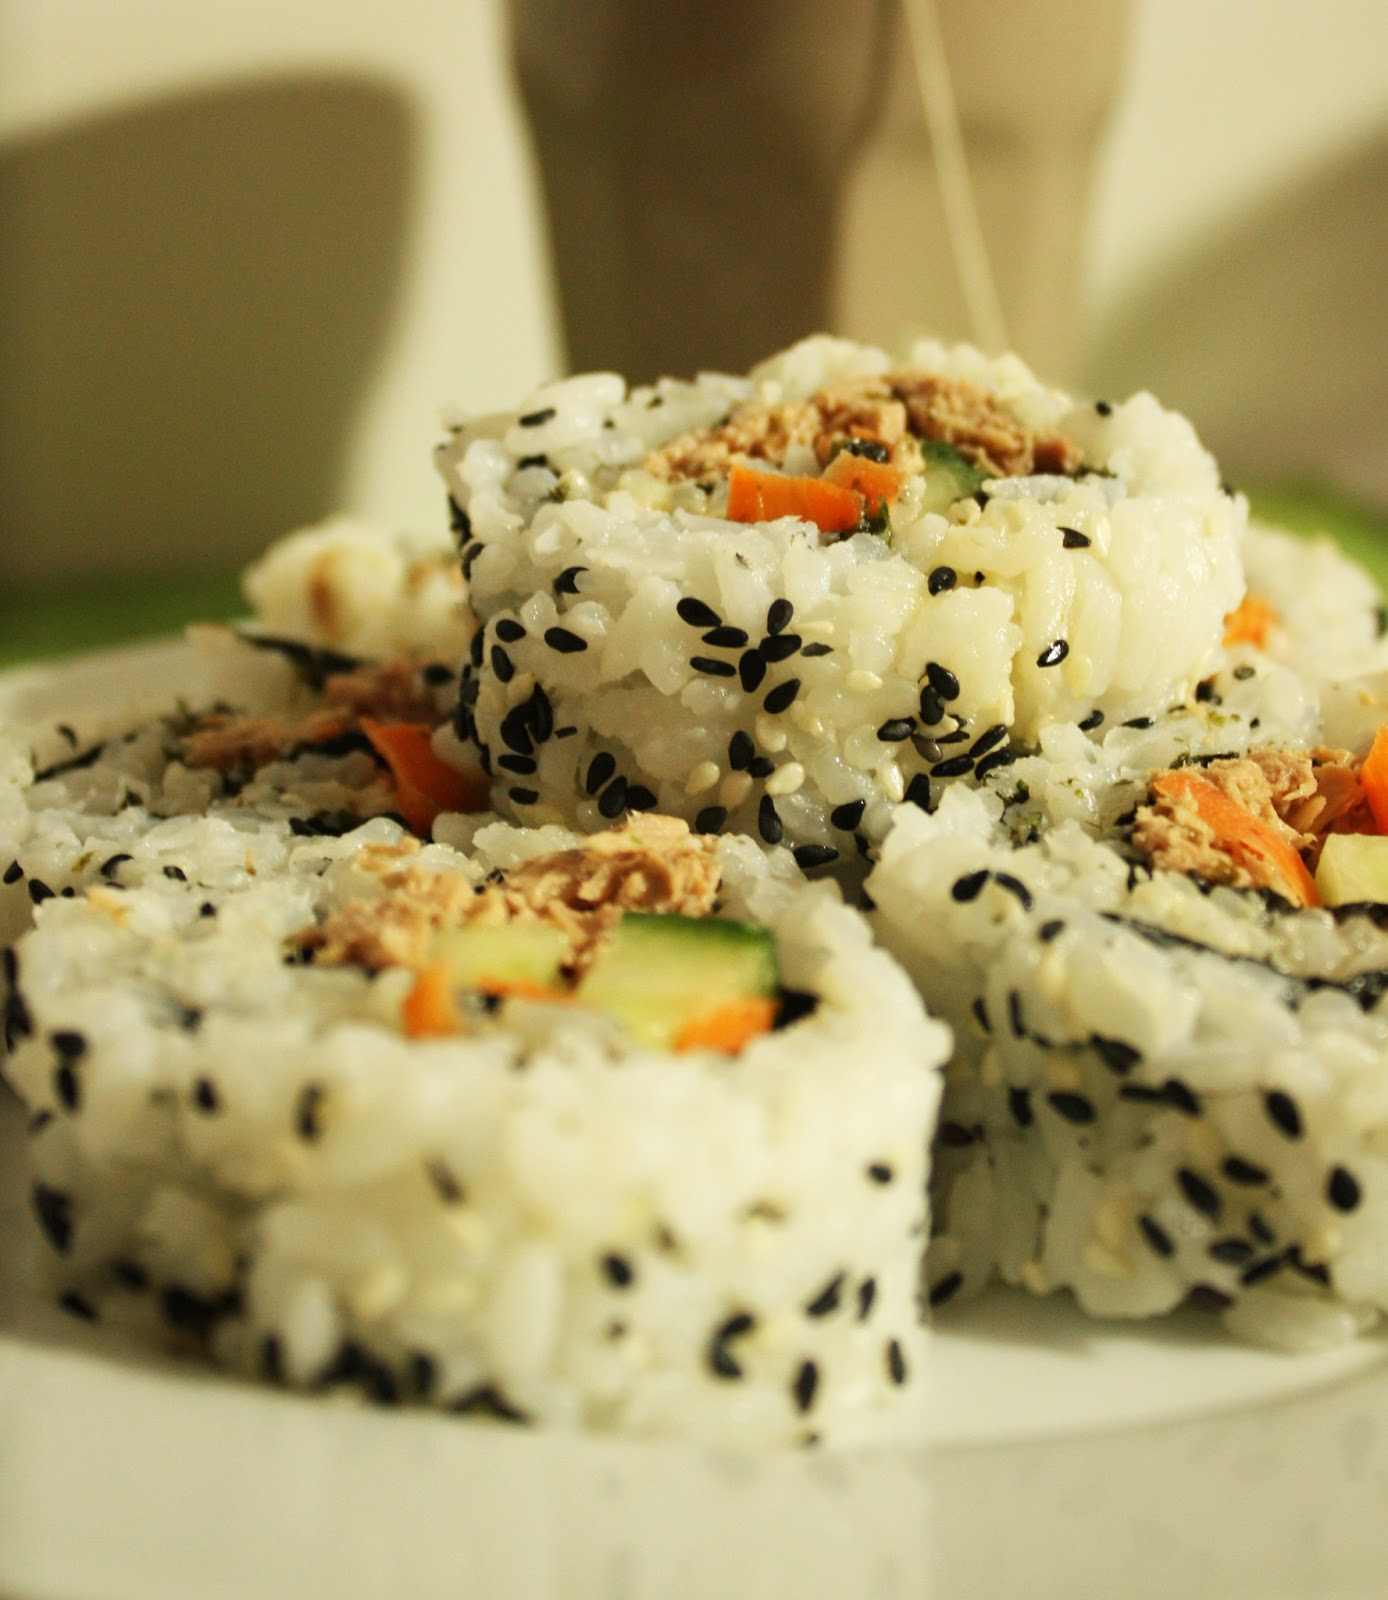
So today, we are going to introduce you guys inside out sushi roll!
and here's a video tutorial!
Ingredients:
1 cup rice
1 cup water
2 1/2 tbsp sushi vinegar
3/4 cup tuna
3 tbsp mayonnaise
1 tsp sugar
1 1/2 tsp sesame oil
1 tsp worcestershire sauce
1/2 cucumber
1/2 carrot
2 pcs nori sheet
sesame seeds (for sprinkle)
1. Add the rice into a bowl and add a cup of water into the bowl.
2. Shake to even out the water.
3. Place the rice into a steamer and cook for 20 minutes on medium heat.
4. While the rice is cooking, you can start preparing the filling. Place the mayonnaise into a bowl and add in the sugar, sesame oil, worcestershire sauce and stir well. You can also spice it up with some cyan pepper if you want.
5. Add in the tuna and mix well.
6. Leave this in the refrigerator and you can prepare the vegetables.
7. Cut up the cucumber half and then half, and slice them into 3 strips.
8. Slice the carrots using peeler for thinner slice, or you could use a grater instead.
9. Pour the prepared vinegar into steamed rice and mix well.
10. Wrap a layer of clinging wrap over the sushi mat (to prevent sushi rice from sticking onto the mat during the process of flipping over, yes, we are flipping over the rice) and bend over the sides of the clinging wrap.
11. Place a sheet of nori sheet on top and spread the rice evenly, make sure to fill the rice up till the edges of the sheet,
12. Sprinkle sesame seeds on top.
13. Gently lift up the sushi and flip it over.
14. Spread the tuna at one edge and add in vegetables.
15. Carefully roll the sushi and press firmly to secure the fillings.
16. Slice the sushi to about 3 cm thick with a wet knife, to prevent the rice sticking onto it.
The picture above is definitely not the egg sushi you normally buy out there/ see from the internet. We were just experimenting to see if we can successfully roll the egg in an egg pan, but we failed. The egg should be rolled the other way round, like this
image sourced from google.
Yeah, go ahead, laugh all you want. *Sulks*
On an unrelated note, have you ever had the thought that how nice it would be, if you wake up to a warm and nicely laid out breakfast, everyday? Bliss?
I must have done a lot of good deeds and collected karma points to receive this hospitality from thesilenttiger in this life. Now I shall keep collecting points so I get to upgrade to presidential-suite-butler-service from her in my next life.
Sometimes, she creates all these cute coffee art, and your morning grogginess get swept away in that very instance, and you will go "aaaaawwwwwwww.......!"
.
.
.
.
.
.
.
.
.
.
.
.
.
.
.
..
...
.....
The milk foam was so thick that I can actually touch its ears and it didn't even move a bit! So it stayed till the bottom of the cup, and looked up to me, like it was comfortably covered with a warm, fluffy, white blanket. *pokes pokes*
Now I should be expecting this for my breakfast tomorrow, shouldn't I?